Estimated reading time: 10 minutes
Prerequisites: Managing your Storyboards - read this article first
What you'll learn
By the end of this article, you'll be able to:
- Share a Storyboard with roles and groups.
- Share a Storyboard with individual users.
- Set permission levels (Can View, Can View & Edit, CanChangeFilterSet).
- Unshare a Storyboard or remove individual access.
- Understand how Data Access Roles interact with Storyboard sharing.
- Embed a Storyboard in SharePoint, Confluence, Google Sites, or other applications.
Overview
Once you have built a Storyboard, you need to decide who can see it and what they can do with it. One Model gives you two sharing approaches: share with roles and groups (for broad distribution) and share with individual users (for targeted access). You can use both on the same Storyboard.
Sharing controls access to the Storyboard container. What data each viewer sees inside the Storyboard is still governed by their Data Access Role. Two viewers with different Data Access Roles will see different data on the same shared Storyboard.
Permissions
Sharing is possible for any Storyboard where a user has edit rights. This could be a Storyboard that has been created by them or a Storyboard that has been shared with Edit rights.
The user also needs to have the permission CanShareStoryboards to share Storyboards with roles or CanShareStoryboardWithUser to share Storyboards with individual users.
Choosing your sharing approach
| Scenario | Recommended approach |
| An entire team or department needs access | Share with roles and groups |
| Multiple teams with different permission levels | Share with roles and groups (set different levels per role) |
| One person needs to review your draft | Share with individual user |
| A stakeholder outside the normal role structure needs access | Share with individual user |
| Broad view access + specific editors | Combine both: roles for view, individual users for edit |
Storyboards can be shared through the three dots at the end of the row in the Storyboard Library page.
Or they can be shared through the Settings tab at the top right of the Storyboard title navigation bar in a Storyboard.
Sharing with roles and groups
This is the most common approach. You assign access to existing Application Access Roles or groups, and every user in that role automatically sees the Storyboard.
- Open the Storyboard or find it in the Storyboard Library.
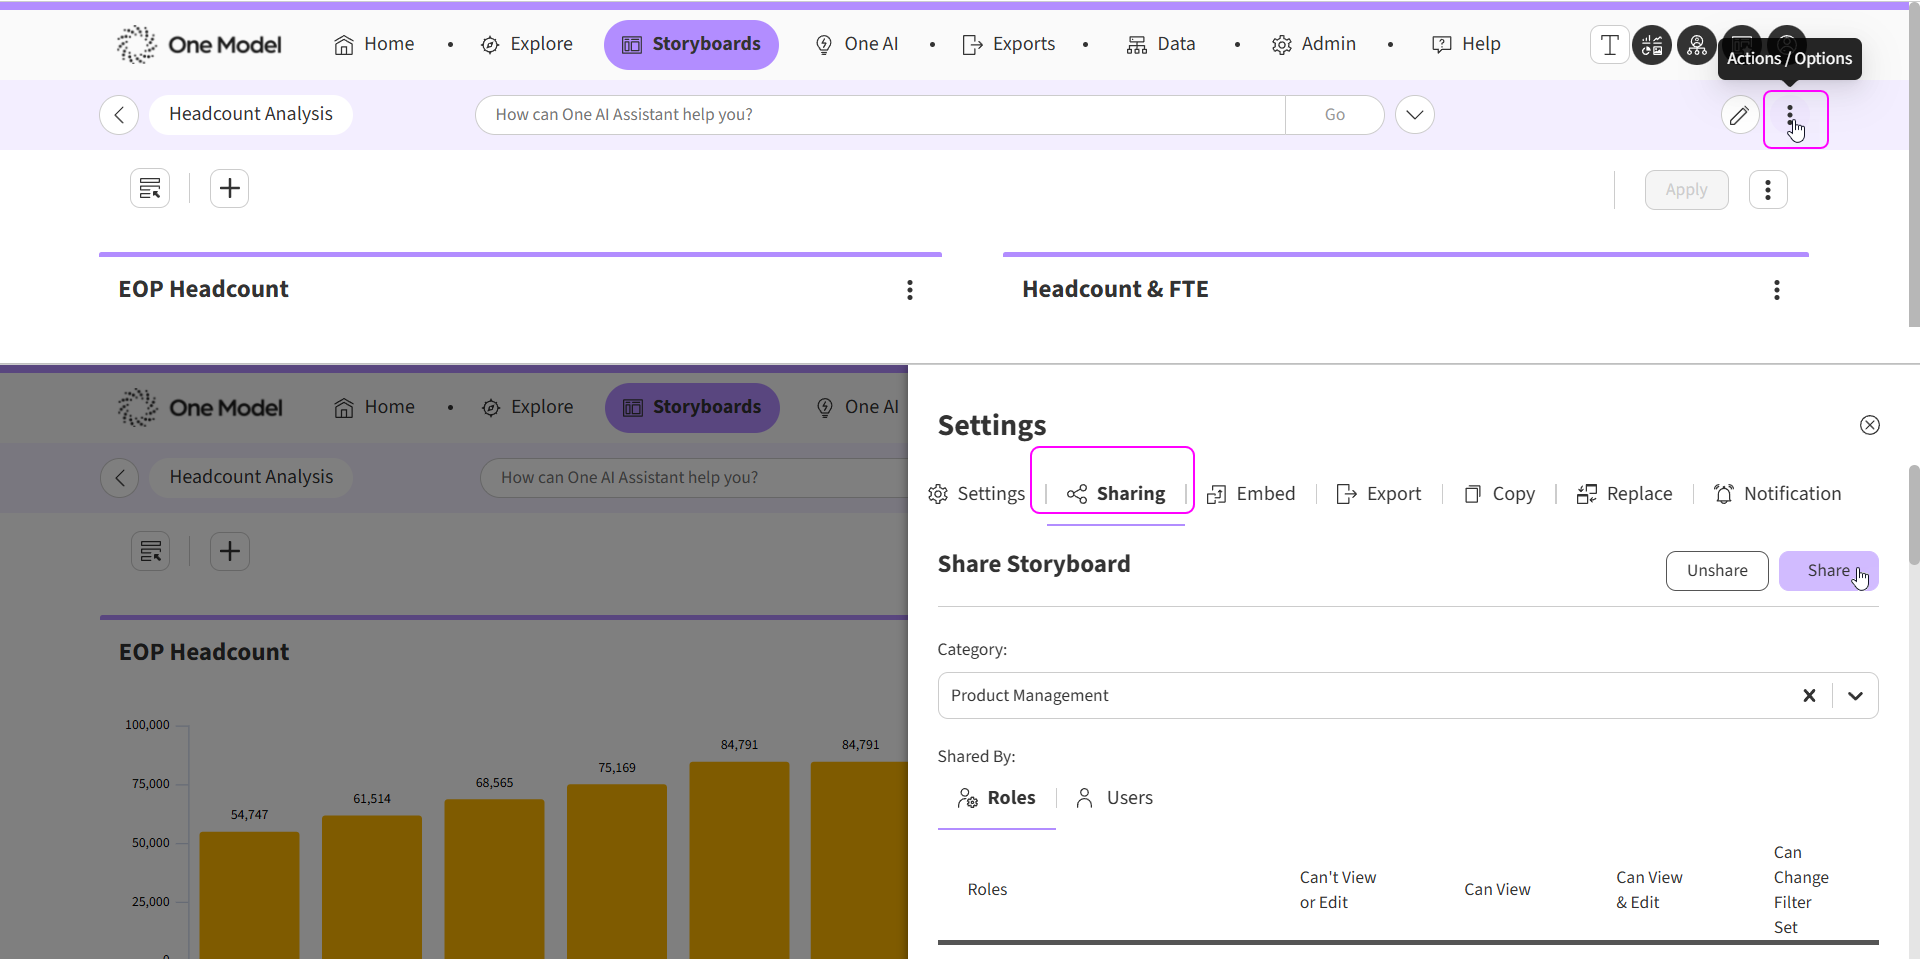
- Click the Settings tab (or the action menu > Settings).
- Click Sharing.
- Select a Category from the dropdown (the Storyboard must be published to a Category).
- For each role or group, set the permission level: Can't View or Edit, Can View, Can View & Edit, or CanChangeFilterSet. The roles displayed here are governed by the Share With Permissions.
- Click Share to save.
To unshare, repeat the steps and change the permission level back to Can't View or Edit. You can also use the Unshare button to Unshare a Storyboard from all Roles and Users. This will make the user who unshared the Storyboard the new Storyboard Owner.
Sharing with individual users
Individual sharing extends access to specific people regardless of their role.
You need the CanShareStoryboardwithUser permission to use this feature. CanShareStoryboardwithUser can be combined but is not required.
- Open the Storyboard Settings > Sharing.
- Switch to the Users tab. Note: If user only has CanShareStoryboardwithUser and not CanShareStoryboards, they will see the User tab by default.
- Search for the user (minimum 3 characters). The list of users displayed here are governed by the Share with Permission of your Data Access Role. You will only see users that have a Data Access Roles that you are allowed to Share with. Newly added users will show with a ‘new’ tag until you click the ‘Share’ button to save your selections.
- Set the permission level: Can View, Can View & Edit, or CanChangeFilterSet.
- Click Share.
To remove individual access, find the user in the Users tab, click Remove, and save.
Permission levels
| Level | What the viewer can do |
| Can View | Open the Storyboard, apply filters, export tiles. Cannot edit. |
| Can View & Edit | Everything in Can View, plus enter Modify Mode and change tiles, layout, and settings. |
| CanChangeFilterSet | Everything in Can View, plus create, save, and manage personal filter sets. |
Note: If a user has access through both a role and individual sharing, removing one path does not revoke the other. You need to remove both to fully revoke access. Learn more about Sharing Storyboards with a User here.
How sharing permissions work
-
Share with Users is additive to Role-based sharing
- A Storyboard can be shared just with a User and does not have to be shared with a Role.
-
Data security is unchanged
- RBS/DAR governs the data rows/objects a user sees.
- Sharing a storyboard does not grant data access—it only grants access to the storyboard container itself. The Data Access Role (DAR) controls which data appears inside it. A user with a restricted DAR will see the Storyboard but may see empty or limited tiles if their role does not include the relevant metrics or populations.
- This feature utilises the Share With permission to generate the eligible list of candidate users who can be shared with individually. You can create restrictions to limit sharing within specific entities by tying the Share With permission to a specific DAR. Learn more about the Share With permission in the Introduction to Role Based Security article.
-
Access by Role or User level
- Access to the Storyboard can be granted by role, by user, or both.
- If a user has access via both, removing one path won’t revoke access if the other still exists.
-
Sharing and Unsharing
- Sharing with a user mirrors the existing functionality of sharing with a Role - for example, any person with the permission to edit the Storyboard has the power to unshare or delete the Storyboard. A deleted Storyboard cannot be recovered.
- When sharing with an individual User, you will automatically be added to the list of individual users. This is so you do not lose access to the Storyboard.
- A user with the permission CanShareStoryboardWithUser can remove themselves from the list of recipients.
- The ‘Shared With’ roles in the Storyboard Library and users column is visible to all users with the permission CanShareStoryboardWithUser.
- The default limit of 100 users applies to Sharing with a User before you should consider creating a role and sharing through the role. This limit is customizable and can be raised or lowered as required.
-
Competing Permissions
- The highest permission wins.
Scenario: A user gains access via a Role (e.g., View) and via Individual User share (e.g., Edit).
- If any path grants Edit, the User is given Edit privileges.
- This aligns with common least-friction collaboration patterns and avoids surprising downgrades.
Download the Admin sharing report
If you are an Admin, it’s important for you to know who has been sharing which Storyboard with whom, which is why we have the Admin Report - Storyboards shared with users and data access roles available for download. Learn more about Admin Reports.
Track sharing activity in Audit Logs
Storyboard Activity, including sharing is tracked in Audit Logs which can be downloaded from the Admin Reports page. Learn more about Audit Logs.
Exporting a Storyboard
In addition to sharing within One Model, you can export Storyboards for offline use:
- Export to PowerPoint - exports the entire Storyboard or selected tiles as a PowerPoint presentation. Configure quality, tiles per page, and header options in the Settings > Export menu.
- Export a tile to CSV - exports the underlying data from an individual tile. Click the three-dot menu on a tile and select Export CSV.
- Screenshots - take screenshots using your preferred tool for quick sharing with people outside One Model. Check with your Admin for compliance requirements.
Note: Exported CSV files do not include forecasted data. If a tile has been drilled down into a dimension, the export includes only the top-level data. Exports are available in the Exports tab and automatically deleted after 7 days.
Enable embedding
Embedding lets you display a live One Model Storyboard inside a third-party application such as SharePoint, Confluence, Google Sites, or Microsoft 365. The embedded Storyboard stays connected to your data and respects all role-based security - viewers only see data they are permissioned for.
You can embed an individual Storyboard or the full One Model application (with the navigation bar) depending on your use case.
An Admin configures embedding in Admin > Company > Embedding Options:
| Setting | What it does |
| Allow Embedding | Enables the embed feature. Must be on. |
| Allow Full Application Embedding | Includes the One Model navigation bar in the embed. |
| Allow External Log Off | Auto-logs users off One Model when they log off the third-party site. |
| Allowed Domains | Restricts which domains can embed your Storyboards. Leave empty to allow any domain. |
Note: Domain rules are strict: the scheme (http/https) must match, domains must match completely, and only single-level wildcard subdomains (*.example.com) are supported.
Copy the embed link
- Open the Storyboard you want to embed.
- Click the Settings tab (three dots) > Embed > Copy Link.
- The embed URL is copied to your clipboard.
You need the Storyboard Administrator permission to see the Embed option.
Embed in your application
Paste the URL directly into your third-party application, or use an iframe with HTML code. Most modern platforms (SharePoint, Confluence, Google Sites) support URL embedding natively.
Tip: Configure SSO with "Log In Automatically" enabled in the SAML 2 Integration panel so embedded Storyboards load seamlessly without a separate login prompt.
Next steps
Now that you can share Storyboards, you might want to explore:
- How to set up Featured Storyboards - curating a panel of key Storyboards for quick access.
- How to embed Storyboards in external applications - sharing live links outside One Model.
- How to set up Storyboard Notifications - scheduling email alerts for Storyboard updates.
Comments
0 comments
Please sign in to leave a comment.